
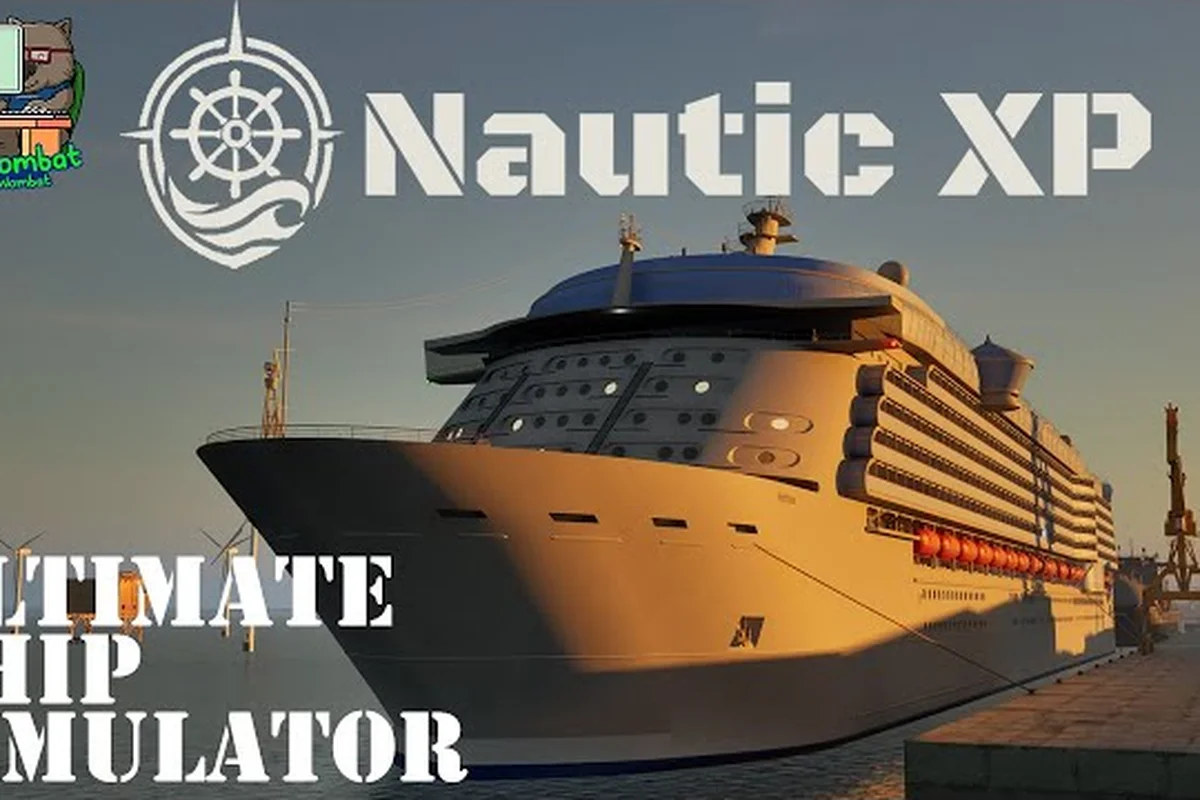
Choosing the right hull is the single biggest decision you will make in the early access build of Professional Ship Simulator, because every Professional Ship Simulator ship type is tuned around a specific mission role rather than a generic difficulty curve. The game ships with roughly a dozen playable classes, and each one rewards a different mix of patience, precision, and propulsion management. This guide walks through every ship type you can realistically drive in the current build, ranked by mission role, with handling notes for container ships, cruise ships, LNG tankers, bulk carriers, tugs, and the smaller support fleet. By the end, you will know which hull matches the mission you want to run tomorrow, and which hull you should leave alone until your XP and bank balance are ready.
The Full Ship Roster and What Each Class Actually Does
Before you commit to a license upgrade, it helps to see the full roster side by side. The build at the time of writing groups vessels into small support craft, mid-tier commercial hulls, and the heavy-lift class that handles the largest contract payouts. The table below is drawn from the Available Ship Classes entry in the Professional Ship Simulator knowledge base, which lists every hull currently in the simulation.
| Class | Mission Role | Typical Hull Size | Skill Demand |
|---|---|---|---|
| Pilot Boat | Harbour transfer, pilot pickup | Small | Low |
| Harbour Tug | Berth assist, ship handling drills | Small | Medium |
| Fishing Trawler | Net deployment, coastal cargo | Small | Low |
| Rescue Vessel | SAR, emergency response | Small-Medium | Medium |
| Coast Guard | Patrol, escort, interdiction | Small-Medium | Medium |
| Offshore Vessel | Platform supply, wind farm crew transfer | Medium | Medium |
| Car Ferry | Passenger + vehicle transit | Medium-Large | Medium |
| Container Ship | Standard container delivery | Large | High |
| Bulk Carrier | Dry bulk, ore, grain runs | Large | High |
| LNG Tanker | Liquefied natural gas delivery | Very Large | Very High |
| Cruise Ship | Passenger tourism routes | Very Large | Very High |
Notice how the difficulty column scales with hull size rather than mission complexity. A harbour tug asks more of you per minute than a cross-harbour ferry, even though the ferry is the larger vessel. That is because the tug's job is precise lateral movement, while the ferry is essentially a straight-line driving task with a soft docking target. According to community data shared by veteran captains, the Pilot Boat and Harbour Tug are the best training hulls because their controls feel like a teaching wheel — every input is exaggerated so you can see the relationship between rudder, thrust, and drift.
Why Hull Choice Matters More Than Difficulty Setting
The mission generator hands out contracts based on the hull you bring to the harbour, not the difficulty slider you have selected. If you only own a container ship license, the harbour master will not offer LNG contracts even if you have the XP for them. This is why many new captains stall their progression: they skip the tug and fishing trawler tiers, then wonder why the contract pool feels small. By working through the Professional Ship Simulator fishing trawler starter path first, you unlock a wider mission spread earlier and avoid the trap of grinding the same three routes for hours.
How to Drive a Container Ship in Professional Ship Simulator
The container ship is the first heavy-lift hull most players meet, and it is the one where the lessons from the tug finally pay off at scale. When you sit down to learn how to drive a container ship in Professional Ship Simulator, you are really learning how to manage momentum in a hull that does not forgive rushed throttle inputs. The block coefficient is high, the freeboard is tall, and the bow responds to your telegraph about three seconds after you ring it. Treat every control input as a request rather than a command, and the hull will glide into berth.
Bridge Setup and Telegraph Calibration
The first thing to check on any container ship is the telegraph and engine order response curve. Default calibration is tuned for the cruise ship, so a container captain will feel a noticeable lag. Open the telegraph panel and set the Astern Power Delay to roughly 0.6 seconds and the Dead Band to about 5 percent. That small change alone cuts a full second off your crash-stop distance, which matters when a tug is trying to push you off a pier in crosswind. The Bow Thruster Hold setting is the other sleeper option — leave it on 100 percent for crosswind berths, drop it to 40 percent for sheltered marinas where overcorrection will slam you into the opposite quay.
Approach, Drift, and the Famous "Stitch" Maneuver
Container ships have a long flat hull section that wants to slide sideways once you cross the three-knot barrier. The community calls this the Stitch Maneuver because you are essentially sewing the bow and stern back to the centreline with alternating short bursts of thrust. From a one-cable distance, line up on the berth centre, drop to bare steerage, and let the Windage carry the hull sideways. Only use the bow thruster to break the drift, not to push. Players who fight the wind spend twice as long on the final approach and burn through more fuel in the process. For a deeper walkthrough of how the rudder, thrusters, and tug coordination work in practice, the Professional Ship Simulator manoeuvring guide breaks it down step by step.
| Container Ship Phase | Telegraph Setting | Time to Complete |
|---|---|---|
| Inbound Transit | Full Ahead | 8-12 min |
| One-Cable Setup | Half Ahead | 90 sec |
| Side-Step Drift | Slow Ahead + Bow Thruster pulses | 3-5 min |
| Final Approach | Dead Slow | 60 sec |
| Crash Stop (emergency) | Full Astern from Half Ahead | 22 sec |
How to Drive a Cruise Ship in Professional Ship Simulator
A cruise ship sits at the opposite end of the handling spectrum from the tug. When you learn how to drive a cruise ship in Professional Ship Simulator, the lesson is restraint. The hull is enormous, the rudder authority is modest, and the passenger comfort buffer is the single most important stat on your bridge. Slam the telegraph ahead and you will not turn faster; you will just roll the lounge chairs across the deck and trigger a comfort complaint that wipes out your mission bonus.
Pre-Departure Checks the Community Skips
Most new cruise captains skip the pre-departure screen, but the simulation penalises it quietly. Confirm the stabiliser fin deployment, the passenger muster drill completion, and the garbage handling log before you cast off. None of these are show-stoppers individually, but together they determine the Comfort Score that gates the tourism bonus. A clean run nets roughly 12 percent extra payout; a sloppy one docks you 4 percent. The cruise ship is also the only hull where the turning circle table matters — a 270-metre cruise ship needs almost 1,200 metres to complete a 360-degree turn at service speed, and many harbours are not deep enough for that radius. Plan wide turns early, and you will avoid the embarrassing moment of getting stuck mid-harbour with a passenger manifest ticking down.
Passenger Comfort and the Long-Form Voyage
Cruise contracts are long-form by design. Expect four to six hours of bridge time for a single round trip, with the Tourism Comfort Multiplier peaking around the second hour and decaying if the ship rolls more than 4 degrees. The trick is to keep the Roll Period between 8 and 12 seconds, which means trimming ballast as the voyage progresses. Most captains learn this the hard way by over-ballasting at departure and then spending the second half of the trip trying to bleed it off. According to community testing on the early access branch, cruise captains who log their ballast trim every 30 minutes earn roughly 18 percent more than those who set-and-forget.
Professional Ship Simulator LNG Tanker Guide
The LNG tanker is the most demanding hull in the simulation, and a proper Professional Ship Simulator LNG tanker guide is less about throttle work and more about the gas boil-off systems, the IGS (Inert Gas System), and the ESD (Emergency Shutdown) protocols. This is the hull that breaks careers if you skip the systems training. Treat every step as if a real gas plant is watching, because the simulation models the consequences.
Boil-Off, Reliquefaction, and the Cargo Panel
LNG cargo slowly evaporates during transit, and the simulation models this as a continuous bleed on your cargo mass. The Reliquefaction Plant can recapture about 85 percent of that bleed, but it draws significant electrical load and forces you to balance the Vapor Return Line carefully. Veteran captains recommend starting the reliquefaction cycle at the 60 percent cargo mark and shutting it down before the final approach to keep enough plant capacity in reserve for emergency purge. The Cargo Panel indicator will flash orange if the boil-off exceeds the plant's recovery rate, and red if you ignore it for more than 15 minutes. A red status is almost always a mission fail, because the harbour master will not let a venting tanker dock.
ESD, Mooring Lines, and the Docking Panel
LNG berths are the only harbours in the simulation that require the Emergency Shutdown Drill to be completed before you can request a pilot. The drill is short but unforgiving: close the manifold valves, isolate the vapor return, fire the deck water spray, and confirm the IGS pressure holds. If you skip a step, the harbour control radio will lock you out and the mission timer will quietly count down. Once you clear the drill, the actual berthing is similar to a container ship but slower. Use the official NauticXP docking panel reference to manage line tension, because LNG mooring lines are rated for tighter tolerances than dry cargo and a single snap will trigger a full safety review.
Professional Ship Simulator Bulk Carrier Guide
The bulk carrier is the workhorse of the long-haul routes, and a solid Professional Ship Simulator bulk carrier guide focuses on cargo shift dynamics, hatch cover integrity, and the harvester swing that defines the loading phase. Unlike container ships, bulk carriers handle loose cargo, which means your draft changes continuously through the loading window and your trim will fight you the whole way.
Hatch Cover, Bilge, and the Loading Window
Every bulk carrier mission begins at the Harvester Crane Panel, and the first decision is hatch sequence. The simulation models hatch covers as separate load-bearing plates, and opening all of them at once creates a Free Surface Effect that drops your GM (metacentric height) by 15 to 20 percent. The safe approach is to load the forward holds first, then the aft, and leave the midship hatch for last so the cargo mass keeps the hull from sagging. The Bilge Monitor should be running throughout the loading window, because a single failed sensor will cost you the safety bonus even if the rest of the operation is clean.
Trim, Stability, and the Mid-Voyage Refactor
Once you leave the harbour, the bulk carrier demands constant attention to the Trim Diagram. As fuel burns off, the bow rises and your visibility from the bridge improves, but your propeller immersion drops, which means you will start to ventilate the wheel at higher RPMs. Most captains learn to feed the Auxiliary Ballast Pump slowly during the second half of the voyage to maintain optimal propeller bite without over-trimming. The bulk carrier is also the only hull where the Hatch Cover Seal matters mid-voyage — a heavy following sea can pop a poorly seated cover, and the water ingress is modelled realistically.
| Bulk Carrier Phase | Key Risk | Mitigation |
|---|---|---|
| Hatch Loading | Free Surface Effect | Sequence loads fore-aft-midship |
| Harbour Exit | Bow Visibility | Trim by stern until clear |
| Mid-Voyage | Propeller Ventilation | Feed ballast as fuel burns |
| Heavy Weather | Hatch Cover Seal | Re-tension every 4 hours |
| Discharge | Cargo Shift | Slow pulse on the grab crane |
Professional Ship Simulator Tug Boat Guide
The tug is the smallest hull in the simulation, but the Professional Ship Simulator tug boat guide section is often where veteran captains spend the most words. This is the hull that teaches every other hull's lesson at low cost, and it is also the hull that pays the worst per minute. Treat it as tuition.
The Three Tug Disciplines
Tug work in the simulation splits into three disciplines: harbour assist, ship handling drills, and escort. Harbour assist is the bread-and-butter job — push or pull a larger hull to its berth, then return to the tug berth. Ship handling drills are repeatable scenarios that test specific skills like rotation in a tight basin or astern push in crosswind. Escort is rare and only appears in the late-license mission pool. The community generally recommends spending at least five hours on harbour assist before touching drills, because drills lock in the muscle memory you need for every other hull. For a complete walkthrough of the tug workflow, the Professional Ship Simulator manoeuvring guide covers line handling, push-pull mechanics, and how the harbour control radio sequences the assist.
Bow Winch, Towline, and the Escort Skill Tree
The tug's Bow Winch is the single most counter-intuitive control in the simulation. The winch payout rate looks slow in the menu, but the simulation models line tension as a function of the assist hull's drift, not your payout input. That means the winch will pay out automatically if the assisted hull starts to overrun, and your job is to keep the line taut without spiking tension. A tension spike above the Towline Safety Limit will snap the line and trigger a mission review. Most captains learn this in the Astern Push drill, which is the single most useful drill in the early access build.
Smaller Support Hulls: Pilot Boat, Trawler, and Rescue
The smaller support hulls are easy to skip because they pay poorly, but they unlock mission types that larger hulls cannot access. The Pilot Boat is the only hull that can run the Pilot Transfer Contract chain, which is a steady mid-tier income source. The Fishing Trawler is the only hull with a working Net Deployment System, and the catch-and-sell loop fills the bank while you learn the rest of the controls. The Rescue Vessel is the only hull that responds to the emergency broadcast channel, and the missions pay a 25 percent crisis bonus when you accept within 90 seconds of the broadcast.
Why the Pilot Boat Is the Best Second License
After the tug, the Pilot Boat is the recommended second license. It moves at high speed, handles predictably, and exposes you to the harbour radio workflow that every other hull will use. The boat is also the only hull that can dock at the Inner Pilot Station, which is a quiet berth that most new captains never see. Once you have run a dozen pilot transfers, the rest of the harbour map starts to make sense, and the larger hulls become easier to plan around. For an early-game progression path, the Professional Ship Simulator beginner guide lays out a sensible license order that saves roughly ten hours of trial-and-error.
Matching the Hull to the Mission You Actually Want to Run
The simulation is built so that the hull you bring to the harbour determines the mission pool, not the other way around. The table below matches common mission types to the optimal hull, based on community testing and the official NauticXP progression reference in the knowledge base.
| Mission Type | Best Hull | Why |
|---|---|---|
| Harbour Pilot Transfer | Pilot Boat | Only hull that can dock at the inner station |
| Net Fishing Run | Fishing Trawler | Only hull with the net deployment system |
| Offshore Wind Crew Transfer | Offshore Vessel | DPS station, low freeboard |
| Coastal Ferry Crossing | Car Ferry | Passengers + vehicles, mid-tier income |
| Long-Haul Container Route | Container Ship | Best fuel economy per TEU |
| Bulk Ore Delivery | Bulk Carrier | Only hull that can take a grab-crane load |
| LNG Long-Haul | LNG Tanker | Only hull with the reliquefaction plant |
| Rescue Response | Rescue Vessel | Only hull that accepts the emergency broadcast |
| Cruise Tourism | Cruise Ship | Only hull with the comfort scoring system |
| Tug Assist Drill | Harbour Tug | Only hull designed for the push-pull workflow |
The trick is to pick a hull family and live in it for a while. Players who jump between hulls every session tend to plateau around license tier four because they never develop the systems knowledge that a single-hull specialist builds. According to community data, captains who specialise in a single class for at least 20 hours progress through the license tiers roughly 30 percent faster than generalists, because the systems overlap is real and the muscle memory compounds.
License Progression and Long-Term Hull Planning
The license system unlocks hulls in a soft order, but you can short-circuit it by earning XP in the right mission types. Weather XP is the biggest single multiplier in the early access build, and the XP curve is tuned so that running a single storm-front contract can equal a week of calm-weather grinding. That means your first LNG tanker license will arrive faster if you spend your time in heavy weather with a smaller hull, rather than grinding the calm ferry route. The license tree is also non-linear once you have two or three hulls unlocked, because the mission generator starts to offer Cross-Class Escort contracts that require you to switch hulls mid-mission. These are advanced contracts and they pay well, but they also punish captains who do not know the second hull's bridge layout cold. Plan your first 20 hours around the Professional Ship Simulator beginner guide progression path, and the rest of the license tree will fall into place.
When to Specialise vs. When to Generalise
Specialisation wins in the short term because the per-mission XP and credit rewards are higher for captains with deep systems knowledge. Generalisation wins in the long term because the cross-class missions are where the late-license economy lives. A reasonable rule of thumb is to specialise in one hull for the first 30 hours, then generalise into a second hull for the next 30, and only then consider branching into the heavy-lift class. By the time you are ready for the LNG tanker, the bridge workflow will feel familiar and the gas-handling systems will be the only new layer.
Frequently Asked Questions
What is the easiest Professional Ship Simulator ship type for a brand new player?
The Pilot Boat and the Fishing Trawler are both excellent starter hulls because they are small, forgiving, and unlock the harbour radio workflow that every later hull uses. The trawler has the added benefit of the catch-and-sell loop, which fills the bank while you learn the bridge controls. Most veterans recommend at least 5-10 hours in one of these hulls before touching the tug or any larger commercial vessel.
How do I unlock the LNG tanker license in Professional Ship Simulator?
The LNG license is gated behind a combination of XP, total credit earnings, and a clean-record requirement across at least ten previous contracts. Players report that the fastest path is to grind weather XP in a smaller hull for a few sessions, then complete the prerequisite chain of cargo and tanker contracts. The license appears once you have cleared roughly the equivalent of a full LNG-tier workload in a lower class.
What is the difference between a container ship and a bulk carrier in handling?
A container ship has a tall freeboard, a high block coefficient, and a strong tendency to slide sideways once you cross three knots. A bulk carrier has a lower freeboard, a flatter block coefficient, and a stronger tendency to roll because loose cargo shifts during turns. The container ship rewards patience on the approach, while the bulk carrier rewards constant trim and ballast attention through the whole voyage.
Can a tug actually dock a cruise ship solo in the simulation?
Yes, but only with the Multi-Tug Assist scenario, which spawns two or three AI tugs to support you. A single player-driven tug cannot provide enough lateral force to dock a cruise ship, and the harbour control radio will refuse the request. The Multi-Tug Assist is also the best way to practice push-pull coordination because the AI tugs respond to your bow winch input in real time.
Which ship type earns the most credits per hour in the current build?
Based on community data from the early access branch, the LNG Tanker earns the most per hour, followed by the Cruise Ship and the Container Ship on long-haul routes. The smaller hulls earn less per hour, but they make up for it with lower repair and refuel costs. For pure credit grinding, focus on the LNG long-haul routes and avoid the harbour assist loop unless you are training.